
Damp and a Site-Mixed Perlite Coat
Two linked pieces of work on one east London terrace: damp at low level inside, and a cement-rendered rear wall outside. Neither was solved with a product off a shelf.
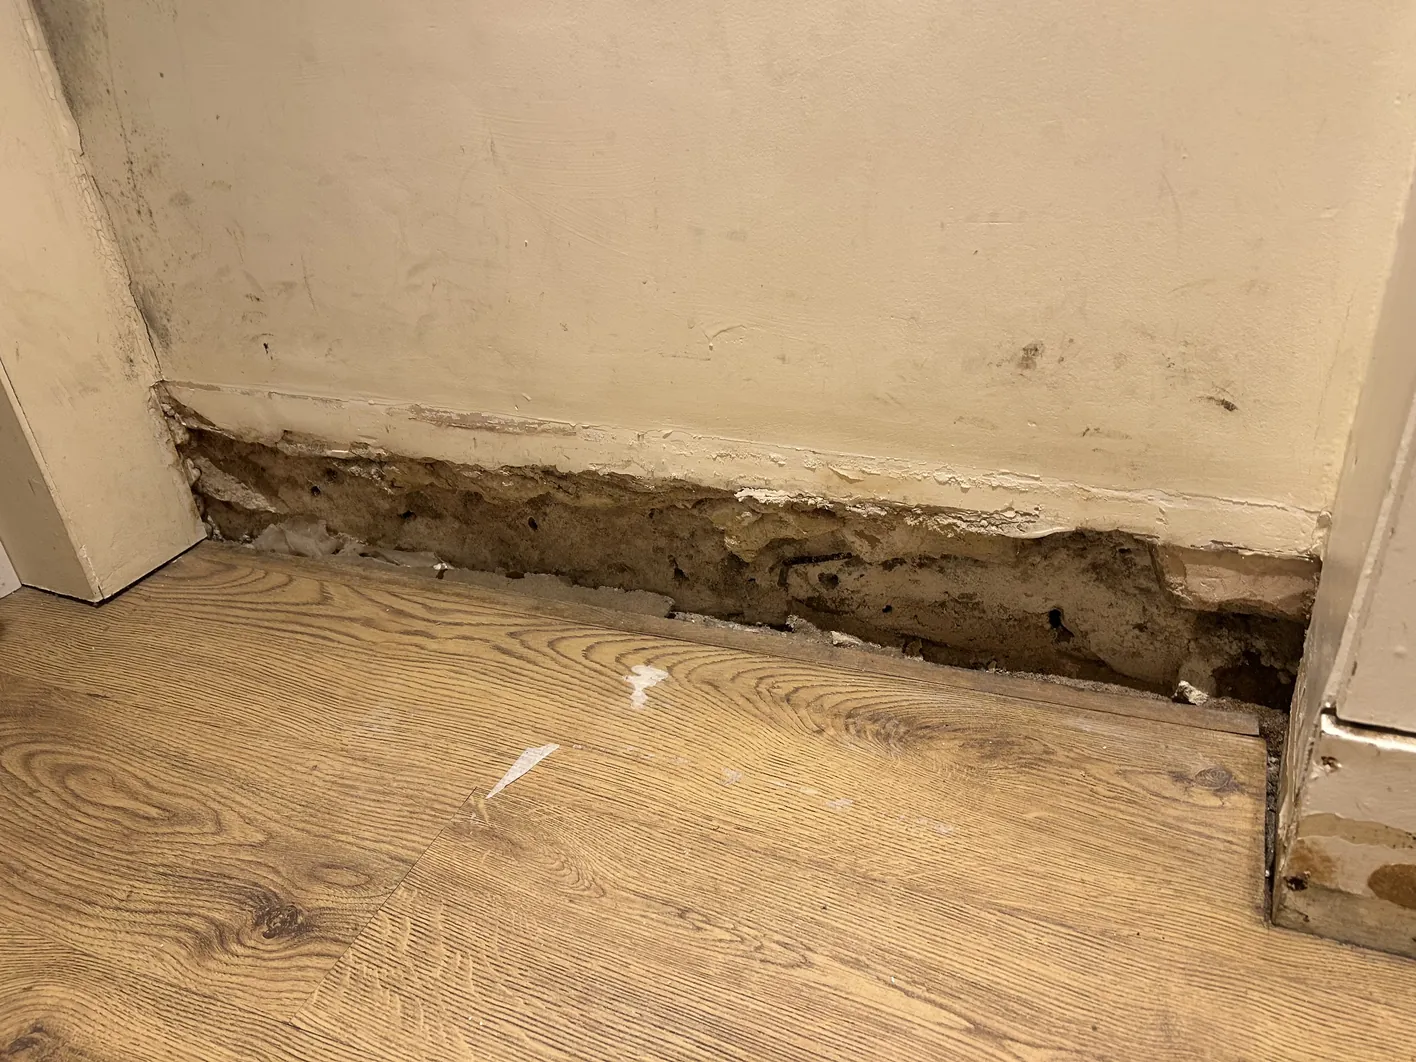
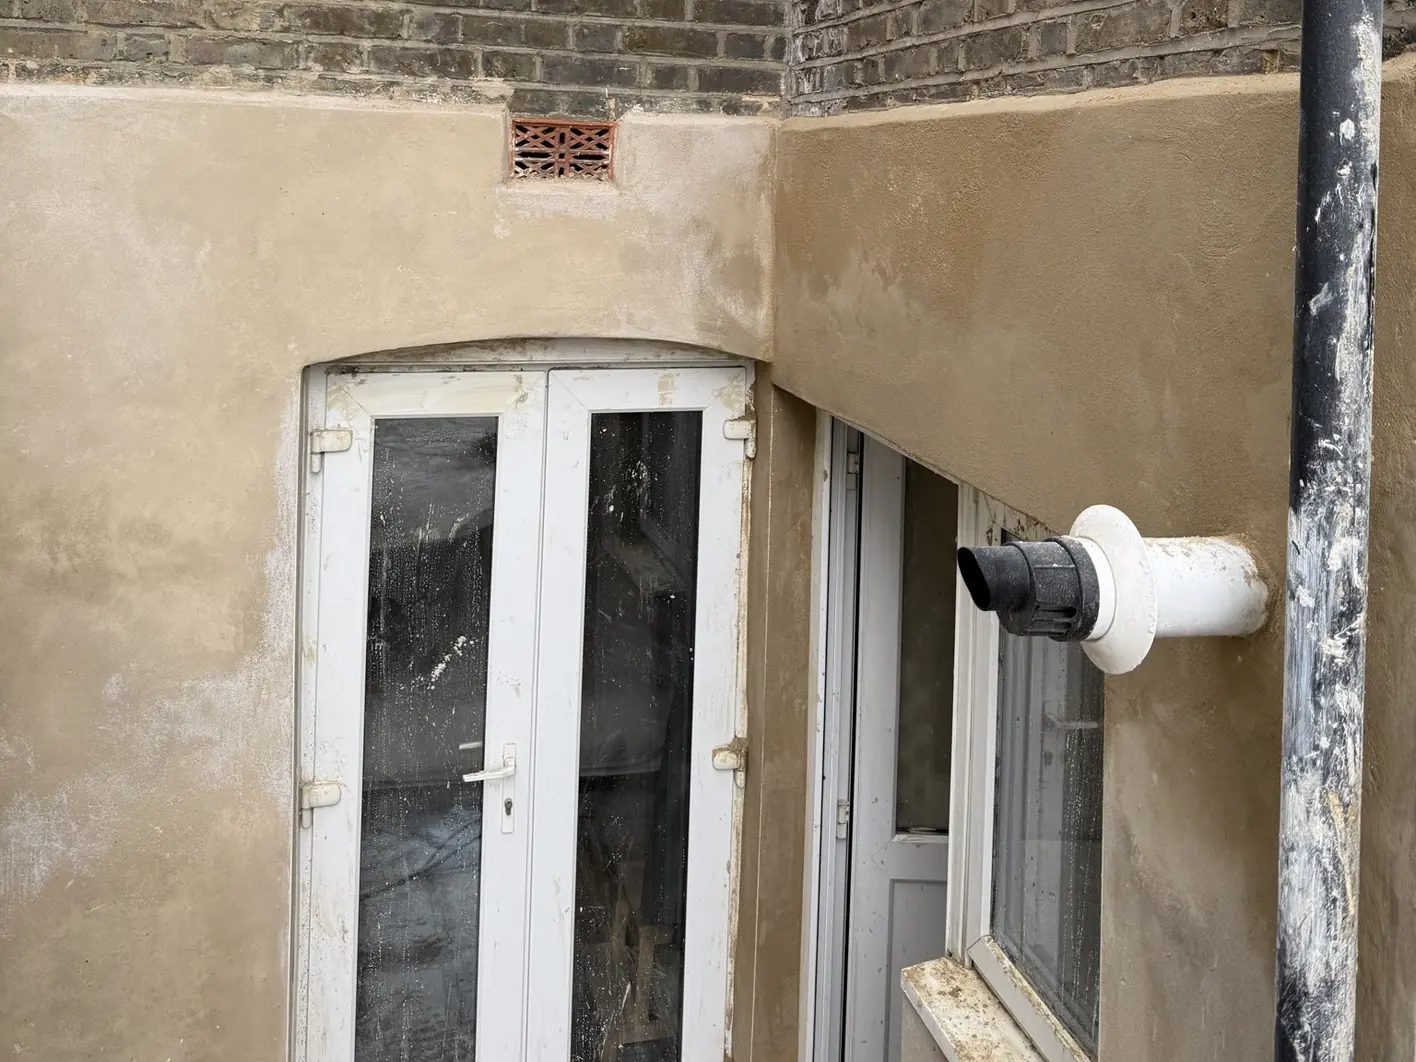
A Victorian terrace in east London with two related failures. Internally, damp and salt damage at low level, worst at the skirting line, under paint and varnish that had sealed the wall. Externally, a rear elevation in cement render and tiled finishes that could not dry.
These are the same problem seen from two sides. A wall that cannot release moisture will find somewhere to put it, and the somewhere is usually the bottom of the inside face.
What Was Specified
Inside, the first decision was not to skim over the problem.
- Mechanically mill the thin paint and varnish off approximately 18 square metres with a Festool Planex, restoring the wall's ability to breathe rather than adding another layer on top of a sealed one
- A site-mixed perlite insulating and levelling coat
- Breathable hydraulic lime finish: 18 square metres at 6mm, and 8 square metres at 10mm where the build needed to be deeper
The perlite coat
Two to two and a half parts perlite to one part lime, the lime being half hydrated and half NHL 3.5, with fibres. Thickness and fibre content set to the depth required, anywhere from 10mm to 40mm.
Outside, heavy stripping of stubborn cement, gypsum and tiled finishes over about 20 square metres back to sound substrate. Then wall levelling and insulation to up to 40mm total build in passes, with screed lines and reveals set so the finished wall is flat, plumb and square rather than merely covered. A lime skim over about 22 square metres, no gypsum anywhere.
Why Not Diathonite Here
On other jobs we specify Diathonite, and it is a good system. On this one the specification says explicitly that no Diathonite or Diasen products are to be used unless re-approved in writing.
That is not a criticism of the product. It is what specifying to the wall rather than to a catalogue actually looks like: this substrate, at these depths, with this moisture history, was better served by a site-mixed perlite coat whose thickness and fibre content we could tune pass by pass. A specification that reaches for the same bag on every job is not a specification.
What Went Wrong
We cut a WiFi cable during strip-out.
It was our error. We contacted the provider, arranged an engineer to reinstate the service, and cut out the redundant cabling and filled the holes as part of making good. Not a building-physics failure, just an honest one, and it is here because a case study containing no mistakes is not a record of a real job.
The Outcome
Preparation and stripping took three to four working days, insulation and levelling another three to four with drying gaps between the thicker passes, and finishing three to four more. Two to three weeks elapsed, weather and drying dependent.
The cement is gone from the rear elevation, the sealed paint is milled off the inside, and both faces are finished in lime over a breathable insulating coat mixed for the wall it went on. The fabric can dry in both directions, which is the only durable answer to damp of this kind.
Related
Posts from real projects, and articles on the things clients actually ask about. Written by the people doing the work. Longer, referenced technical papers live under white papers. The assemblies themselves are on the build-ups page.